Shred Guitar for Beginners: An Introduction to Alternate Picking
September 1, 2026
by eduardoA practical introduction to alternate picking for guitarists getting into shred, covering picking motion, pick grip, economy of movement, and a progressive routine for building cleaner speed.

Watching someone play fast is quite a sight.
It looks impressive and can sound completely out of this world. Maybe you have listened to a song before and thought, “if I work hard enough, someday I’ll be able to play like that.”
And that is a fair question: how did guitarists like Zakk Wylde, Alexi Laiho, Andy James, Yngwie Malmsteen or Tony MacAlpine learn to play that fast?
The reality is a lot less mysterious than it seems.
Playing fast is, to a large extent, about controlling small movements until they become efficient and repeatable.
That is why learning alternate picking is a great place to start if you want to learn how to shred guitar. The idea itself is extremely simple:
down, up, down, up.
Things get difficult when you have to maintain that motion while changing strings, skipping strings, coordinating both hands and eventually increasing your speed.
This guide is meant for guitarists who already know a few basic scales, can read tabs and have used a metronome before. The goal is to gradually internalize what efficient movement feels like when you start trying to play faster.
Before you start: make the movement easy
Before worrying about BPM, it is worth understanding a few of the physical ideas behind alternate picking technique.
You do not need to obsess over finding one single “perfect” technique.
Different guitarists hold the pick differently, generate their picking motion from different parts of the arm and may even make small changes to their technique depending on what they are playing.
What matters is learning to recognize unnecessary movement and tension.
That does not mean playing completely loose. Your muscles obviously have to do something. The idea is to avoid using more force than you actually need to produce and control the note.
A lot of what we are going to talk about follows that same principle: do the necessary work while wasting as little movement as possible.
In the video, Justin shows how to practice the basic alternate picking motion and also talks about the importance of pick angle. I will go deeper into that later, but here you can actually hear and see what changes when you attack the string with the pick at an angle.
Wrist, forearm, or both?
There are different ways to create the up-and-down motion required for alternate picking. Two of the most common are using mainly the wrist or allowing some forearm rotation to participate.
Wrist motion tends to feel smaller and more localized. Since you are moving a relatively small part of your body, it can be easier to keep the picking motion compact and control how far the pick moves away from the string.
The forearm, on the other hand, can feel a little freer. When you rotate it, the hand moves along with it because everything is part of the same system. Have you ever noticed how rotating your forearm also changes the position of your hand?
I like thinking about it as a set of Russian dolls, but in terms of movement size.
From larger to smaller: arm → forearm → wrist/hand → fingers → pick
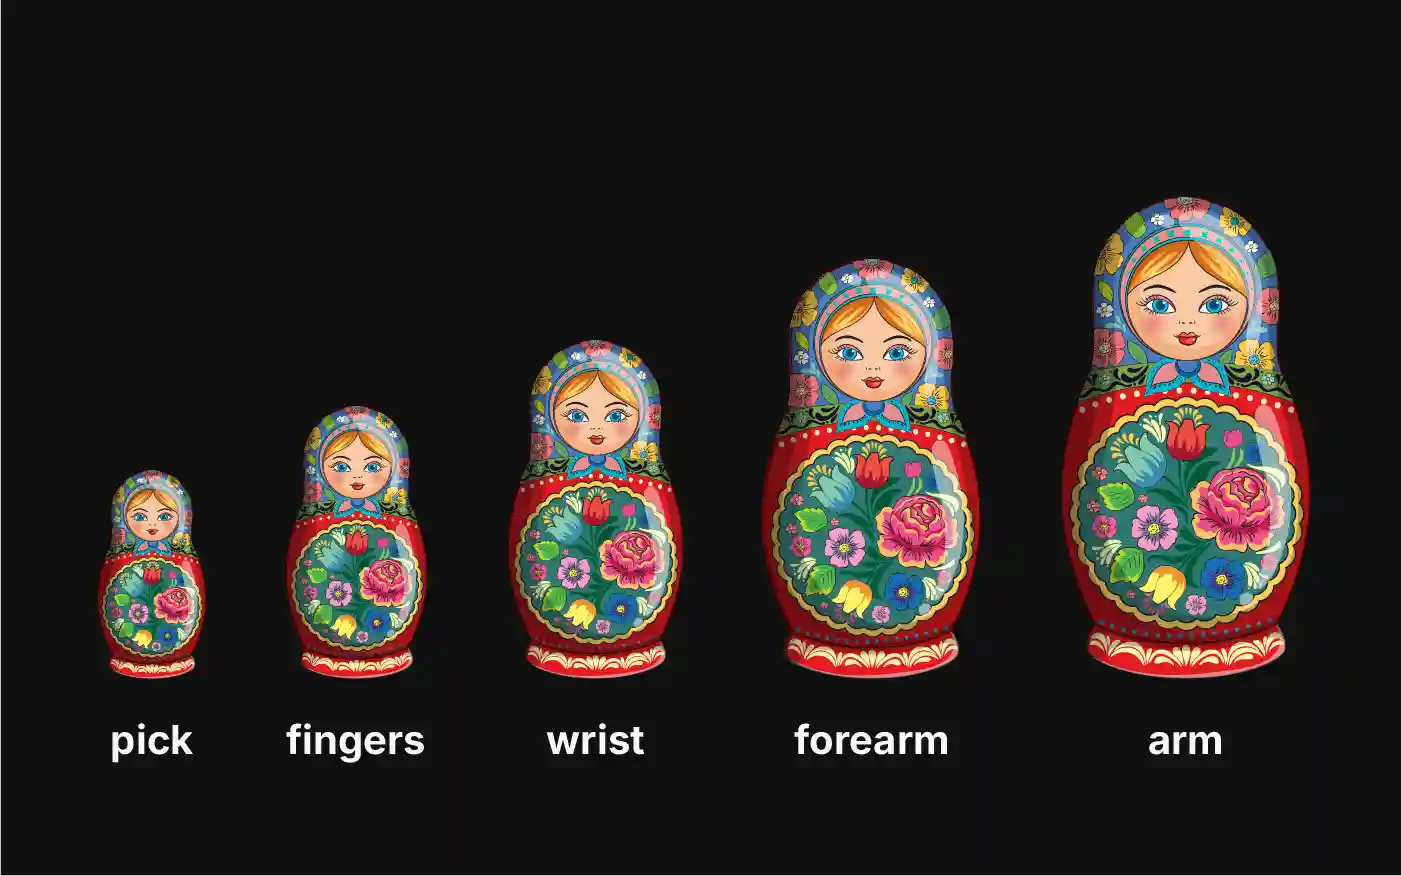
You can generate a larger motion from a larger part of the arm, or rely on increasingly smaller movements as you need more precision. Even the fingers holding the pick can make tiny adjustments without requiring much wrist movement.
That does not mean you should always choose the smallest possible piece. It also does not mean that “pick from the wrist” should be interpreted as “lock everything else in place.”
If you let the forearm participate slightly, that motion can naturally carry through the hand and eventually the pick.
What you do want to avoid is using more of your body than necessary. If every note requires a huge movement from the elbow or shoulder, you are probably covering more distance and spending more effort than you need to.
Personally, I have noticed lately that allowing a little more forearm movement helps some string changes feel more fluid and, in certain situations, helps me play cleaner.
At other times, especially when I need a very small and precise movement, I end up relying much more on the wrist.
I do not think you need to choose one and use it for everything.
Over time, you may end up using different amounts of wrist and forearm depending on what you are playing.
The question is not:
“wrist or forearm?”
It is:
“how much movement do I need to play this cleanly without unnecessary tension?”
There isn’t one correct way to hold a pick
The same thing happens with pick grip.
Some guitarists rest the pick against the side of the index finger and place the thumb over it, keeping the hand relatively closed.
Others hold it closer to the tips of the thumb and index finger.
Some guitarists even use three fingers, and you will probably come across plenty of other variations.
The important question is not whether your grip looks “correct.”
It is:
Can you keep the pick stable without creating unnecessary tension in your hand?
You need enough pressure to stop the pick from moving around uncontrollably, but not so much that your fingers, hand or wrist become rigid.
And you do not necessarily have to keep exactly the same grip for everything. You may naturally make small adjustments depending on what you are playing.
Although comfort ultimately comes first, if you want a clear reference point, this video shows a very common way of holding a guitar pick. You can use it to compare your current grip and see whether a small adjustment could give you more freedom or reduce unnecessary tension.
If you already hold the pick differently and it works for you, that does not automatically mean you are doing it wrong.
Angle the pick slightly instead of fighting the string
Another very common preference is using some degree of pick angle.
A pick that hits the string completely flat can create more resistance because more of its surface has to move through the string.
When you angle it slightly, the edge of the pick can glide across the string more easily.
That is why you will see many fast guitarists using some degree of pick angle. But I would not treat a specific number such as 30 or 45 degrees as a universal rule.
The goal is not to hit an exact angle.
The goal is to reduce unnecessary resistance without losing control.
Find an angle that allows the pick to move through the string comfortably while still giving you the attack and tone you want.
This is part of a broader principle we can call economy of motion.
And I am not talking about economy picking as a guitar technique.
I literally mean being economical: do not cover more distance than necessary, do not use more force than necessary and do not add movements that are not helping you produce the note.
Find a familiar hand position
Once you find a position that feels comfortable, try not to rebuild it every time a difficult phrase appears.
The idea is to have a kind of default configuration for your picking hand: a position you are familiar with and from which you can make small adjustments without starting from scratch every time.
If you change techniques, for example from alternate picking to tapping or hybrid picking, you may need to adjust that position.
But while you are doing the same thing, keeping a familiar reference point can help you play with fewer unnecessary adjustments.
That is another part of economy of motion:
it is not only about how far the pick moves, but also how much you have to reposition your entire hand just to keep playing.
Keep the pick close to the strings
This becomes increasingly important as your speed goes up.
If every downstroke sends the pick far below the string and every upstroke sends it far above it, you are adding distance that has to be covered before you can play the next note.
Try to keep the motion inside a relatively small area around the string.
I like thinking of this as a picking window.
The pick needs to cross the string, but it does not need to travel dramatically farther than that.
The smaller you can keep that window without becoming rigid, the less distance the pick has to cover between notes.
And this is one of those little habits that takes time to develop.
I still catch myself playing something horribly sometimes and have to check what I am actually doing: whether the pick is traveling too far, whether the motion has stopped feeling aligned or whether I have started adding tension just because I am trying to play faster.
These details are easy to neglect once you start focusing too much on BPM.
That is also part of practicing.
Don’t forget to breathe
A big part of fast guitar playing is eliminating unnecessary effort.
And that does not apply only to the pick or your fretting hand. It also applies to what the rest of your body is doing while you play.
When you are trying to play something close to your current speed limit, it is very easy to start tensing up without realizing it.
You grip the pick harder.
Your wrist becomes stiff.
Your shoulders rise.
Sometimes you even stop breathing normally.
It has happened to me.
There are phrases I know I can play, but I also know they sit slightly outside my comfort zone. I concentrate so hard on getting them right that when I finish, I realize I was practically holding my breath.
So when somebody tells you to “relax”, one very practical thing you can actually do is:
don't forget to breathe.
Breathing normally while you play can help you notice when you are turning a difficult passage into a full-body effort.
And that brings us back to the same principle:
use only as much effort as you actually need.
Alternate Picking Exercises to Get You Started
I will try to keep these explanations short because at this point it is better for you to actually play the exercises, and then tell me how it went, than to spend pages talking about every detail.
I arranged these alternate picking exercises so that you can first become familiar with the movement and then gradually increase the complexity.
Do not rush to the next exercise.
If one of them reveals something you cannot control yet, stay there for a while.
Part of practicing is discovering exactly what you need to work on.
Chromatic Lines
This is your first practical introduction to economy of motion.
You do not need to press extremely hard against a fret for the note to sound, and your fingers do not need to lift farther away from the fretboard than necessary.
Experiment with it.
How much pressure do you actually need?
How far do your fingers really need to move away from the fretboard?
You will probably realize fairly quickly that relatively light pressure can be enough.
The idea is to start removing movements and effort that are not contributing anything.
Single-String Alternate Picking
You have probably made the down-up motion plenty of times before, but maybe you have never deliberately practiced it while trying to close the picking window.
Here I only want you to isolate the movement.
Keep the pick close to the string and pay attention to how small you can make the motion without losing clarity or rhythm.
It is not a demanding exercise, and that is exactly why you can focus almost completely on controlling your alternate picking motion.
G Minor Pentatonic Position Runs
This is where alternate picking across strings begins.
If you have never experimented with allowing a little more forearm movement, this can be a good place to try it.
Play it slowly and first observe what your hand naturally wants to do before trying to correct everything.
If you consistently fail on the same string change, isolate that small section and repeat it separately before returning to the complete exercise.
Personally, I find it easier to reposition my hand between strings by allowing the forearm to participate, then use a smaller wrist motion when I stay on a single string.
You will have to find the combination that allows you to play cleaner.
G Major 3NPS Sequences
This exercise has a small bonus: it shows you how much material you can get out of a major scale by using different sequences.
But there is something else we care about here.
Three-notes-per-string patterns are a great opportunity to put everything we have discussed into practice: keeping the pick close, reducing unnecessary finger movement and synchronizing both hands.
This is where you start finding out how well those economical movements survive when the pattern becomes more demanding.
Shred Lick
I included a short shred guitar lick to show you how some of these ideas can start turning into something closer to an actual musical phrase.
You do not have to learn it as if it were a mandatory piece.
Use it as an example and, if you want, change it or create something better.
The point is to show you where the previous exercises can eventually lead once you start combining them.
Short Speed Bursts
The speed bursts are here so you can experience higher speeds without having to sustain them for very long.
That is why I would not treat them the same way as an exercise you might repeat continuously for five minutes.
They are short bursts: play fast for a short period, rest, then try again.
The goal is to gradually become familiar with what faster movements feel like without completely sacrificing the control you have been developing throughout the routine.
To wrap things up
The time assigned to each exercise is only a suggestion.
You can make your practice routine shorter or longer depending on what you need to work on that day.
That said, I would give a little more attention to the more isolated exercises, especially Chromatic Lines and Single-String Alternate Picking, because those give you a chance to focus on small details such as pressure, distance, synchronization and the size of the movement.
This alternate picking practice routine takes around 34 minutes, making it a solid starting point if you want to work on the technique in a more structured way.
You do not have to complete it from beginning to end every single time.
You can shorten exercises, repeat one that is giving you trouble or build your own version of the routine.
The idea is for this to serve as an introduction before you eventually move on to a much more complete alternate picking course or program.
And most importantly, remember what we talked about at the beginning:
Playing faster does not necessarily mean moving more.
Sometimes it means learning to do less movement, better.